> ## Documentation Index
> Fetch the complete documentation index at: https://docs.aptlystar.ai/llms.txt
> Use this file to discover all available pages before exploring further.
# Users & Roles
## Users in Your Organization
The **Users** section displays a list of all members within your organization. You can assign them roles with varying permissions based on their responsibilities.
This enables clear role-based access control for managing projects, agents, and settings.
## Roles and Responsibilities
There are **three types of user roles** in the organization, each with distinct levels of access and responsibility:
### 1. Owner of Organization
* Full access to all organizational settings, users, and permissions
* Can add, edit, delete, or activate/deactivate users
* Can invite users as **Admin** or **Owner**
### 2. Admin of Organization
* Can manage users, data, and organization settings
* May have limited access to owner-level features
### 3. User / Agent Manager
* Can access assigned projects and resources
* Cannot manage other users or modify organizational settings
***
## User Management Actions
Add and invite users to your organization and assign them roles.
View and manage user details in the User Console.
***
## Add Users to Your Organization
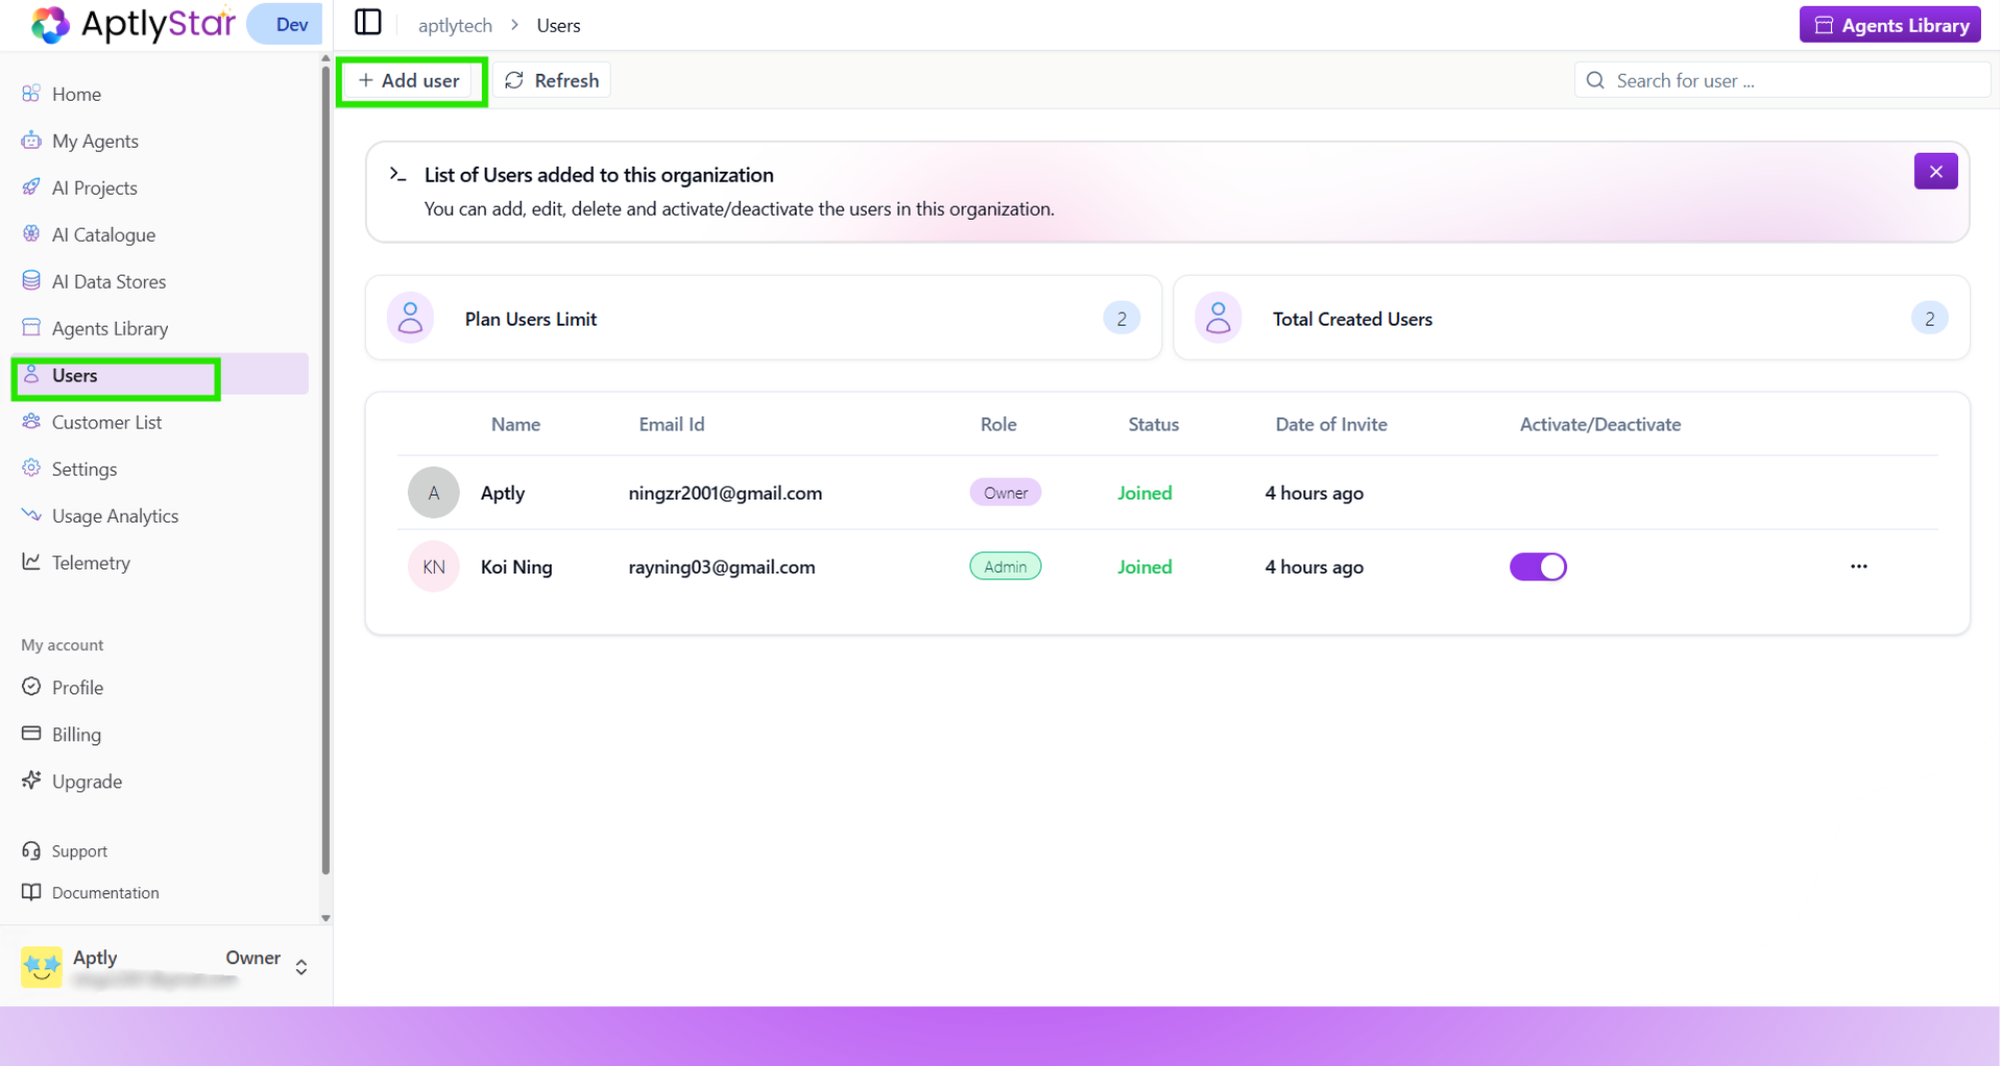
To add a new user:
* Navigate to the **Users** section (1)
* Click on **Add User** (2)
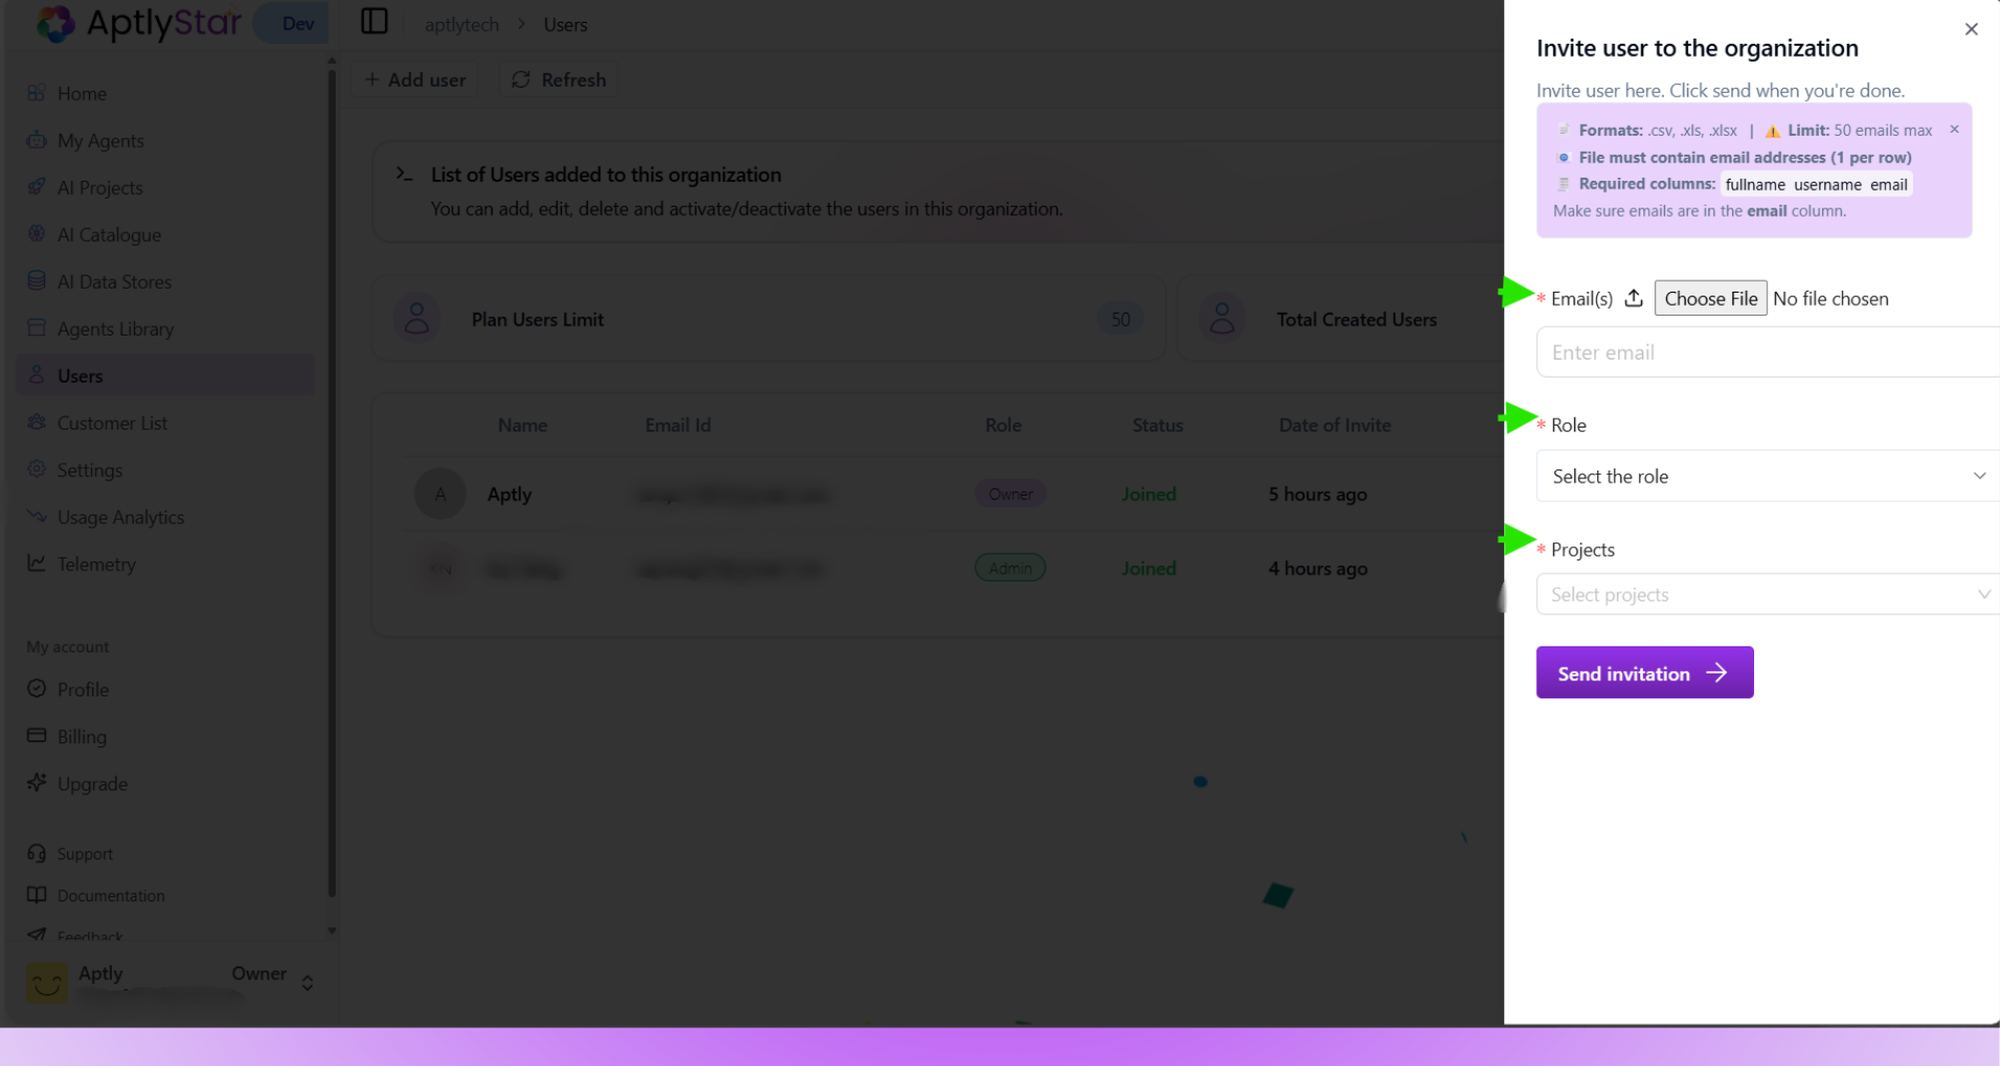
* Fill out the following:
* **Email address** (3)
* **Role selection** (4)
* **Assign to project(s)** (5)
* Click **Send Invitation** (6)
Once the invitation is accepted, the user will be successfully added.
 Below is the modal where you send the invite and define the user role:
 ## Bulk User Upload via CSV
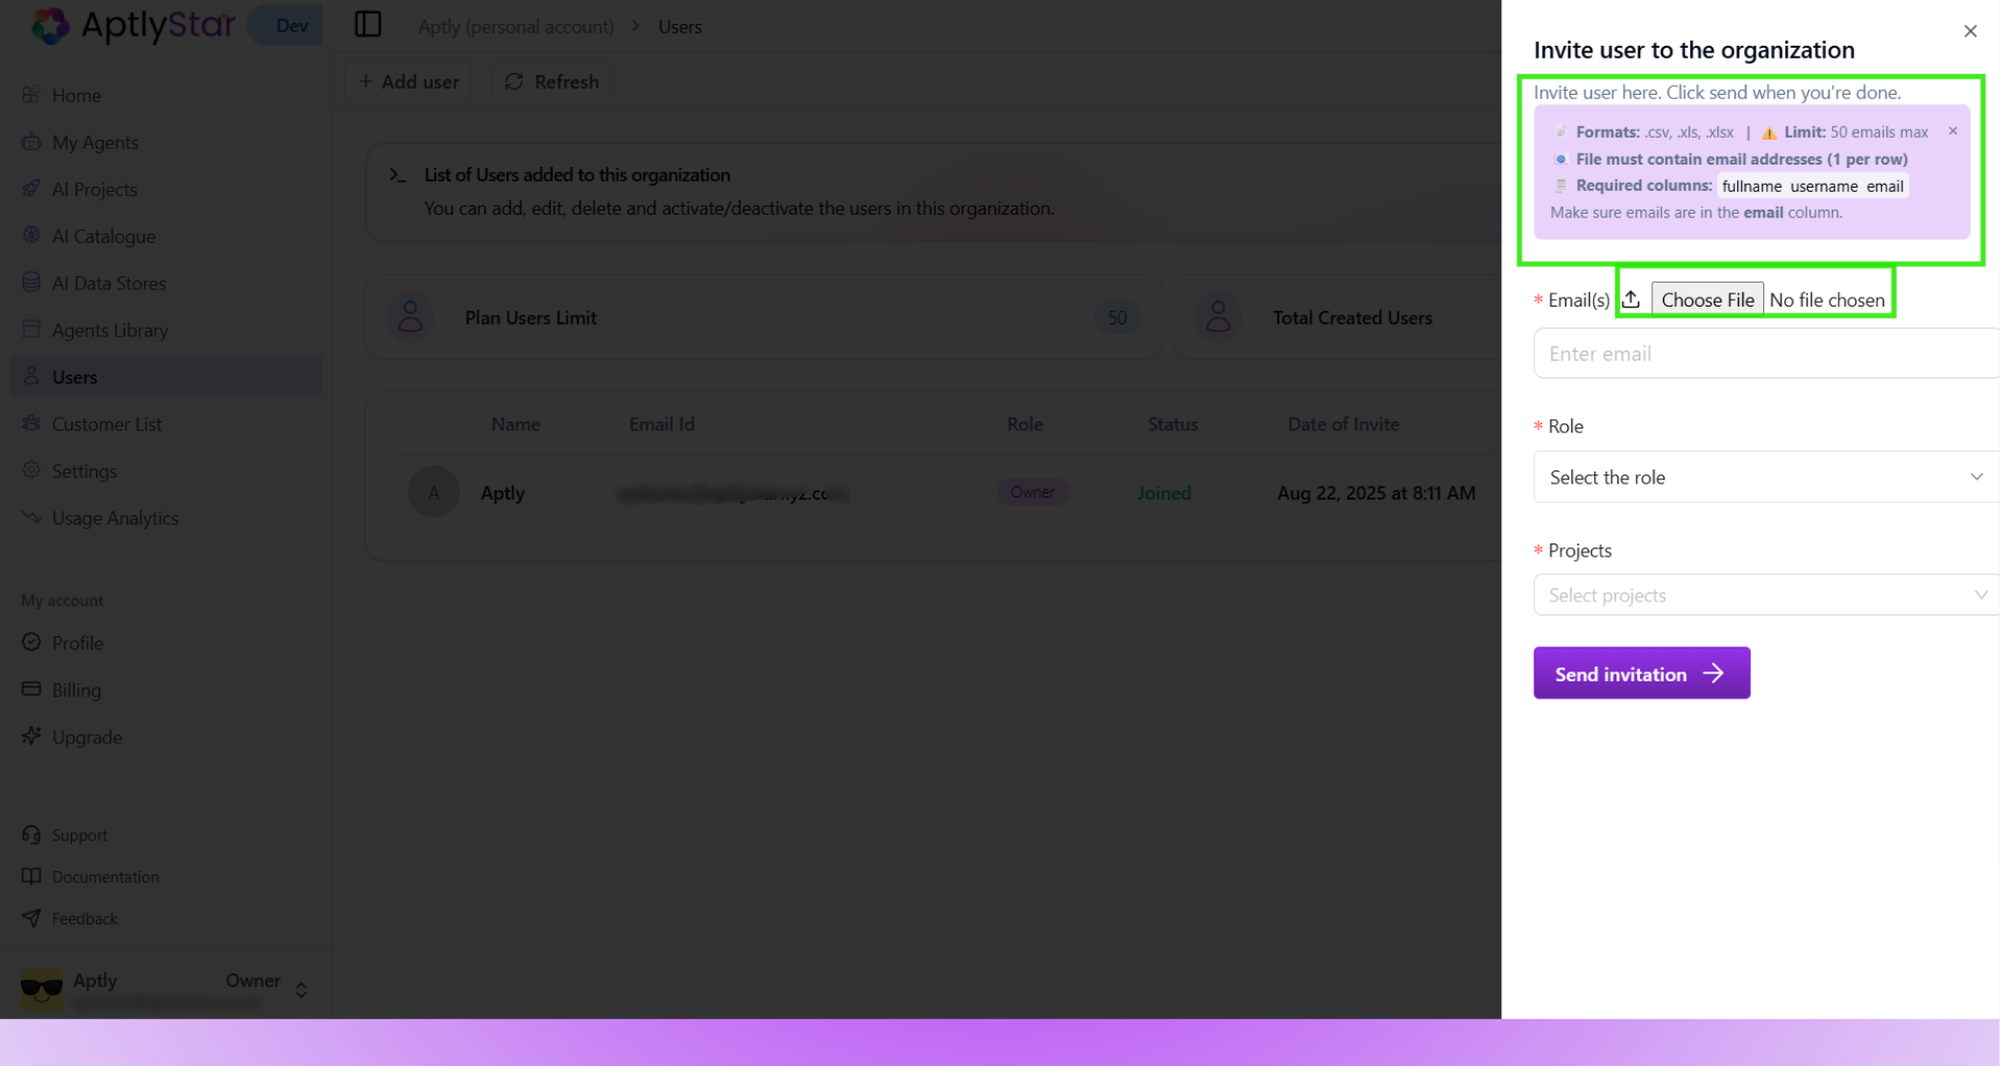
In addition to adding users one by one, you can also **invite multiple users at once** using a **CSV or Excel file**.
This is useful for onboarding larger teams quickly — simply upload a file containing multiple email addresses.
## Bulk User Upload via CSV
In addition to adding users one by one, you can also **invite multiple users at once** using a **CSV or Excel file**.
This is useful for onboarding larger teams quickly — simply upload a file containing multiple email addresses.
 #### CSV Upload Requirements
* **Accepted formats:** `.csv`, `.xls`, `.xlsx`
* **Limit:** Up to **50 email addresses per upload**
* **File rule:** Each email address must appear on a **separate row**
* **Required columns:**
* `fullname`
* `username`
* `email` *(ensure all emails are listed in this column)*
You can use the **Choose File** option in the “Invite User” modal to upload your CSV.\
Once uploaded, the system validates the file format and displays any errors if the structure doesn’t match the required fields.
> 💡 **Tip:** Double-check that the CSV includes the column headers exactly as shown (`fullname`, `username`, `email`) to ensure smooth import.
## User Console
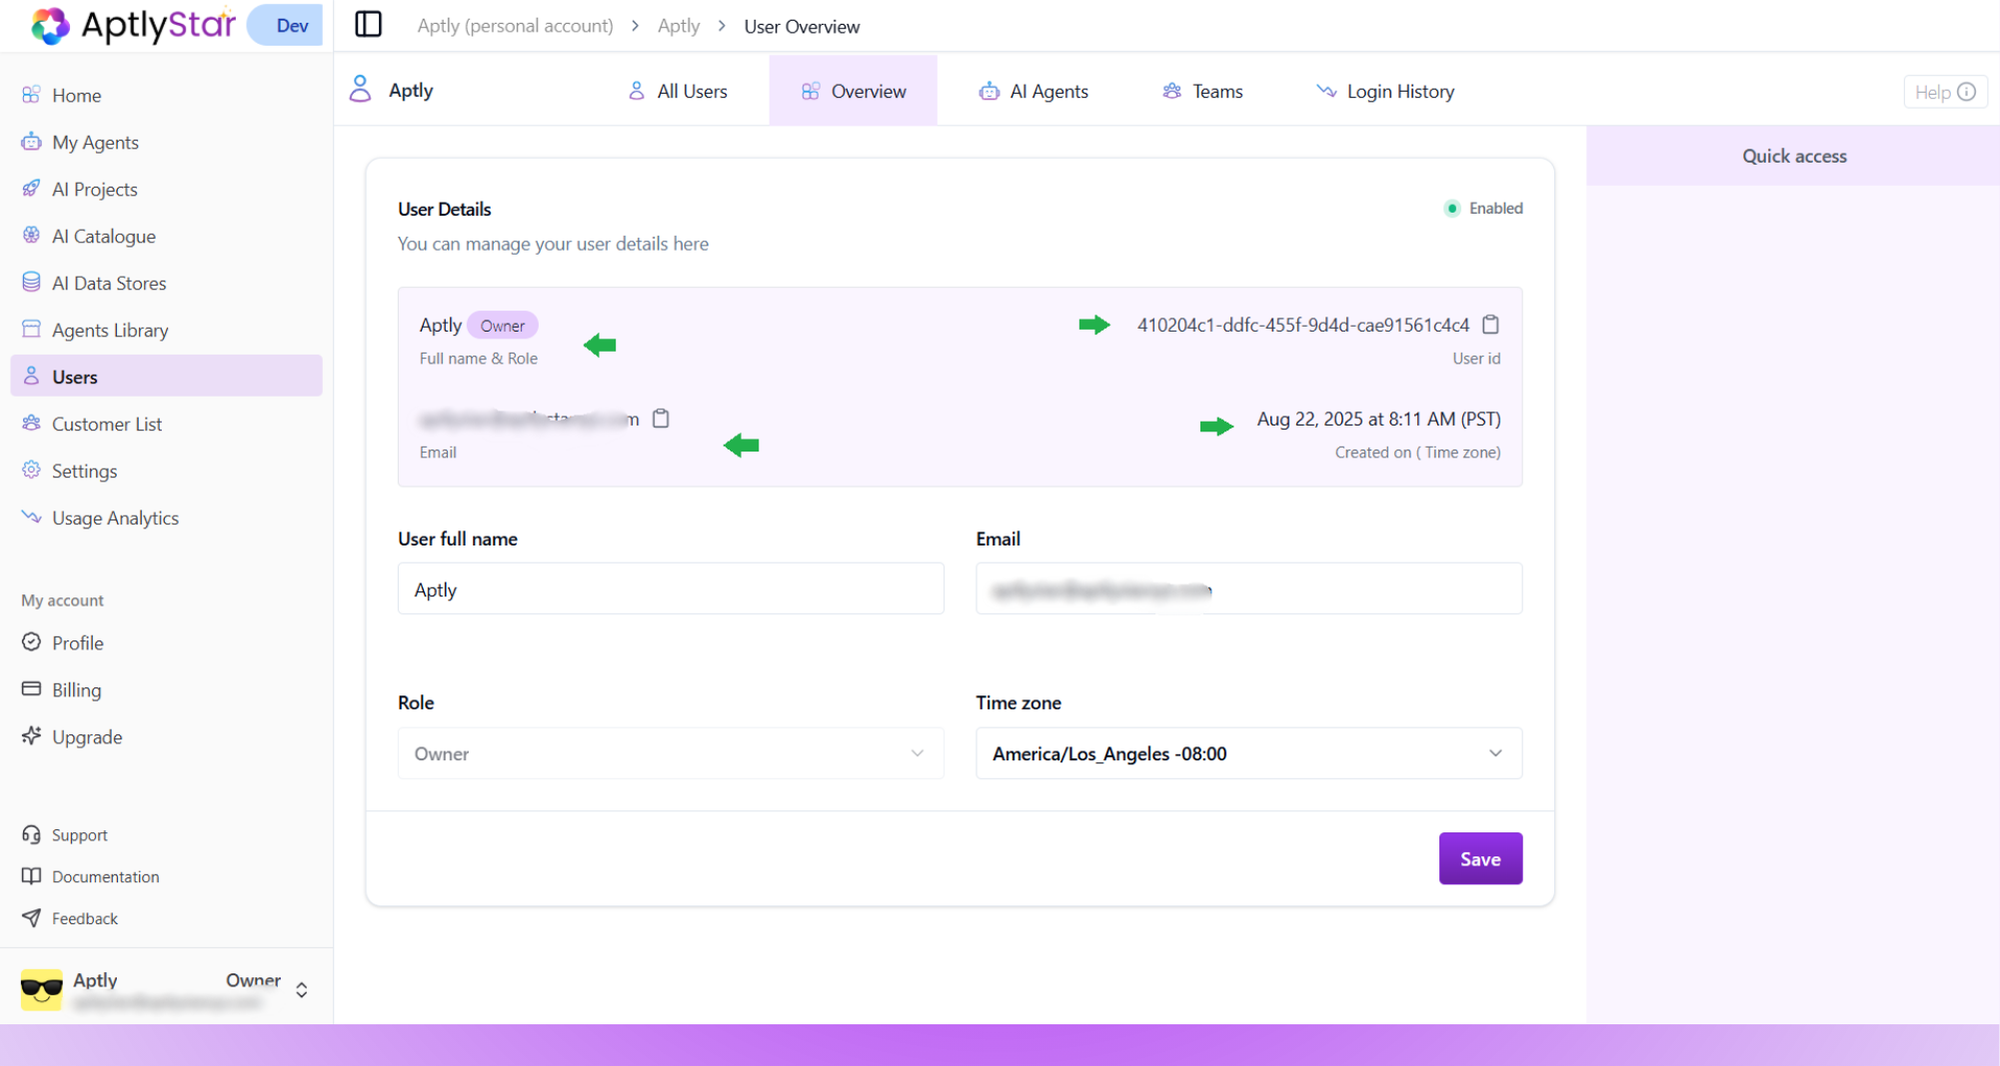
The **User Console** provides a complete view of your profile and access details within the organization.\
Here, you can view and update your account information such as:
* **Full Name**
* **Email ID**
* **Role** (e.g., Owner, Admin, or User)
* **User ID**
* **Time Zone**
* **Account Creation Date**
* **Status** (Enabled/Disabled)
#### CSV Upload Requirements
* **Accepted formats:** `.csv`, `.xls`, `.xlsx`
* **Limit:** Up to **50 email addresses per upload**
* **File rule:** Each email address must appear on a **separate row**
* **Required columns:**
* `fullname`
* `username`
* `email` *(ensure all emails are listed in this column)*
You can use the **Choose File** option in the “Invite User” modal to upload your CSV.\
Once uploaded, the system validates the file format and displays any errors if the structure doesn’t match the required fields.
> 💡 **Tip:** Double-check that the CSV includes the column headers exactly as shown (`fullname`, `username`, `email`) to ensure smooth import.
## User Console
The **User Console** provides a complete view of your profile and access details within the organization.\
Here, you can view and update your account information such as:
* **Full Name**
* **Email ID**
* **Role** (e.g., Owner, Admin, or User)
* **User ID**
* **Time Zone**
* **Account Creation Date**
* **Status** (Enabled/Disabled)
 ***
### Tabs in the User Console
The top navigation tabs allow you to explore different views:
* **All Users** – View a list of all members in the organization
* **Overview** – Manage your personal details and settings
* **AI Agents** – See agents created or managed by you
* **Teams** – Check which teams or projects you belong to
* **Login History** – Review all your login activities
This makes it easy to access teammate information, assigned projects, and your own workspace from one central view.
***
### Login History
The **Login History** tab displays detailed records of your login activity.\
It helps you track your access sessions and ensure account security.
***
### Tabs in the User Console
The top navigation tabs allow you to explore different views:
* **All Users** – View a list of all members in the organization
* **Overview** – Manage your personal details and settings
* **AI Agents** – See agents created or managed by you
* **Teams** – Check which teams or projects you belong to
* **Login History** – Review all your login activities
This makes it easy to access teammate information, assigned projects, and your own workspace from one central view.
***
### Login History
The **Login History** tab displays detailed records of your login activity.\
It helps you track your access sessions and ensure account security.
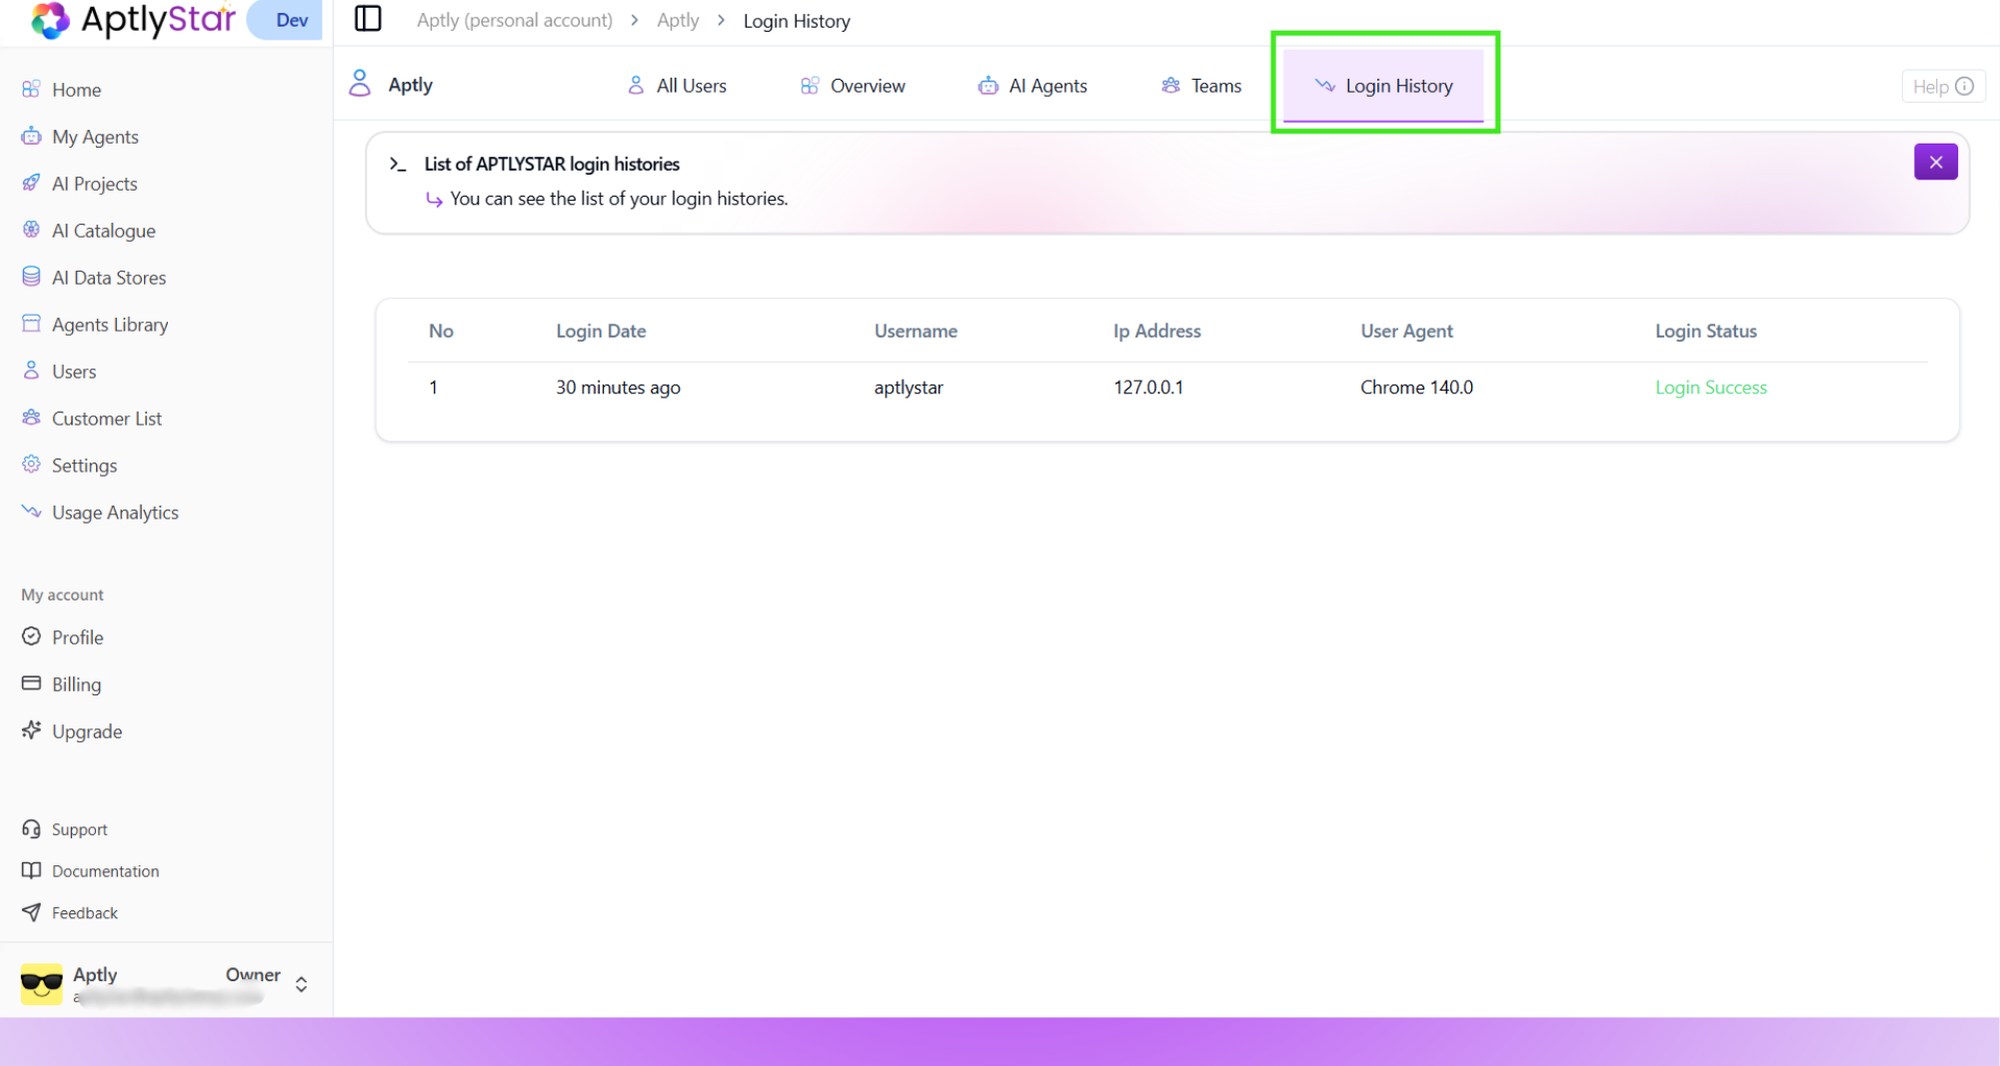 #### Information Shown in Login History
* **Login Date & Time** – When you last accessed your account
* **Username** – The name used during login
* **IP Address** – The network location of your session
* **User Agent** – The browser or device used to log in
* **Login Status** – Whether the attempt was successful or failed
> 💡 Use this tab to review your recent sessions and identify any unfamiliar login attempts.
#### Information Shown in Login History
* **Login Date & Time** – When you last accessed your account
* **Username** – The name used during login
* **IP Address** – The network location of your session
* **User Agent** – The browser or device used to log in
* **Login Status** – Whether the attempt was successful or failed
> 💡 Use this tab to review your recent sessions and identify any unfamiliar login attempts.